Want to achieve that wide-eyed, lifted look with minimal effort? Mastering the art of curling your lashes can do wonders to brighten up your eyes and add an instant touch of glam. Whether you're using a classic eyelash curler or the newer, heated versions, curling your lashes the right way can make a big difference in your makeup routine. In this guide, we'll explore both traditional and heated eyelash curlers, so you can find the best method for your grande lashes.
Why Curling Your Lashes Makes a Difference
Curling your lashes opens up your eyes, making them appear larger and more defined. It lifts the lashes, creating a natural curve that enhances your eye shape. By curling your lashes before applying mascara, you can achieve a long-lasting lift that enhances even the simplest makeup looks.
What You’ll Need
- Traditional eyelash curler: A classic tool to lift and curl lashes.
- Heated eyelash curler: For a longer-lasting curl (optional).
- Mascara: To add volume and lock in the curl.
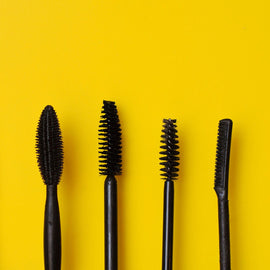
- Eyelash comb (optional): To separate lashes for a polished finish.
Option 1: Using a Traditional Eyelash Curler
Step 1: Choose the Right Eyelash Curler
Invest in a quality curler with a curved design that fits your eye shape. Brands like Shu Uemura, Tweezerman, and Shiseido are popular choices for their durability and gentle silicone pads, which protect your lashes from breakage.
Step 2: Start with Clean Lashes
Make sure your lashes are clean and free of any makeup. Mascara can cause your lashes to stick to the curler, which increases the risk of breakage.
Step 3: Position the Curler Correctly
- Look slightly downward while keeping your eyes open.
- Place the curler at the base of your upper lashes, being careful not to pinch your eyelid.
- Make sure all your lashes are inside the curler, then gently squeeze.
Step 4: Use the Pulse Technique
Instead of squeezing hard at one point, use gentle, pulsing motions. Start at the base of your lashes, hold for 5-10 seconds, then move to the middle of your lashes and pulse again. Finally, move to the tips and give one last pulse. This method creates a more natural curve.
Step 5: Apply Mascara (Optional)
After curling, apply mascara to lock in the curl. Start at the base of your lashes and wiggle the wand upward for even coverage.
Option 2: Using a Heated Eyelash Curler
What is a Heated Eyelash Curler?
A heated eyelash curler works similarly to a hair curling iron, using gentle heat to create a longer-lasting curl. It’s a great option if you have straight or stubborn lashes that tend to fall flat after using a traditional curler. Brands like Panasonic, Lash Star, and Chella offer high-quality heated curlers that are easy to use.
Step 1: Choose a Good Heated Eyelash Curler
Opt for a heated curler with adjustable temperature settings and a protective design to prevent burning your skin. These tools are typically battery-operated and have a small heating element that warms up in seconds.
Step 2: Prep Your Lashes
Ensure your lashes are clean and dry. Heated curlers work best on bare lashes since any leftover mascara can melt and cause clumping.
Step 3: Heat the Curler
Turn on the curler and allow it to heat up for a few seconds. Most heated curlers have an indicator light to let you know when they’re ready. Always test the temperature on your hand to ensure it's not too hot.
Step 4: Curl Your Lashes
- Hold the heated curler against the base of your lashes for a few seconds.
- Slowly glide the curler upward, following the natural curve of your lashes.
- Hold for 5-10 seconds at different sections (base, middle, and tip) for a uniform curl.
Step 5: Apply Mascara
Once your lashes are curled, apply a coat of mascara to enhance the look and set the curl in place. Heated curlers typically hold the curl longer than traditional ones, especially when combined with mascara.
Extra Tips for Perfectly Curled Lashes
- Don’t curl after applying mascara: Doing so can cause your lashes to stick to the curler, increasing the risk of damage.
- Clean your curler regularly: Whether you’re using a traditional or heated curler, wipe it down after each use to remove any residue.
-
Be cautious with heat: If you're using a heated curler, always test the temperature on your hand before applying it to your lashes to avoid burns.
Common Mistakes to Avoid
- Using too much pressure: Pressing too hard can create a harsh, unnatural bend.
- Skipping the pulse technique: Using a single squeeze can crimp your lashes instead of creating a smooth curve.
-
Overheating the curler: With heated curlers, use a gentle temperature setting to avoid damaging your lashes.
Conclusion
Whether you prefer the classic eyelash curler or the convenience of a heated version, curling your lashes is a quick way to make your eyes appear brighter and more youthful. By following these steps and avoiding common mistakes, you can achieve beautifully curled lashes that last all day.
Give these techniques a try, and let your eyes steal the show!


